
Do you know How To Make A Dog Ramp For Bed. Your friend goes everywhere with you, including to bed at night and walks to the park and the mailbox. However, adding a convenient ramp that is collapsible for storage and conceals pet bedding feels like a tailored fit when more than one hop is needed or arthritis makes the trek to bed too onerous. The gradual inclination might even prevent injury if your dog is one of the 20% of older dogs with osteoarthritis, according to specialists.
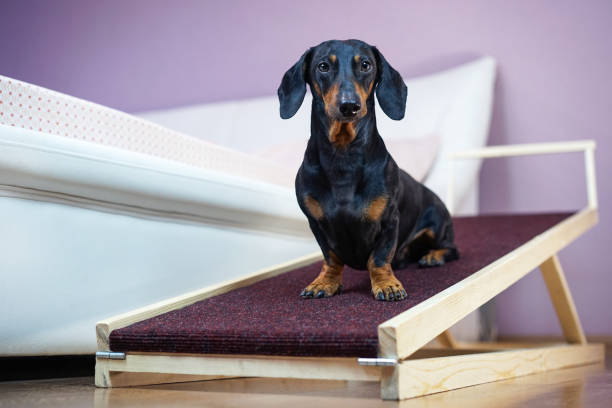
How to Build a Dog Ramp
Step 1
Trim List
- A 14 x 3112-inch piece of plywood for the bottom
- 2 sides of 1×5 at 1212 inches.
- 2 sides of 1×5 at 45 inches.
- One 14-inch 1×5 bottom crosspiece
- 2 @ 1512 inch 1×5 legs
- One 1×5 leg crosspiece measuring 1412 inches.
- 1×16 lid – 1 @ 451.2″
- One 7-inch handle for a 1×3 block
Step 2: Trim the Pieces
Cut the box’s top, legs, and other components to length using a jigsaw and the cut list’s specifications. Mark the edge of the box’s long 1×5 sides at 2 inches from one end and 10 inches from the other.
At each of these marks, cut off the corners of the 1×5 with a jigsaw while using a straightedge as your guide. The front of the ramp, where it will rest on the ground, will have the lengthier cut. The area where the ramp meets the edge of the bed at the back or top is where there will be a shorter cut.
3rd Step: Trim the Legs
One leg’s top should be rounded over. Create the curve using a coffee can as a template, then cut the arc with a jigsaw. Onto the second leg, trace the curve, then cut it.
Step 4 Build the Box Sides
Make a mark on the back of each 1×5 side piece 2 inches from the longest point. Make a second mark 10 inches away from the front’s longest point. At each mark, make a straight line across the 1×5 with a Speed Square.
The 1212-inch box should be placed inside the lines between the sides. To keep the sides square, clamp them into place. 1 5/8 inch trim head screws should be inserted through the long sides and into the ends using a drill/driver.
Step Five: Fasten the Bottom
The bottom of the box sides, or the shorter edge, should be where the plywood is fastened using a drill/driver and 1 5/8 inch trim head screws. Fix a 14-inch 1×5 crosspiece flush with the plywood bottom’s front edge.
Step 6: Drill Leg Bolt Hole Holes
Bore a hole at the back end of each long side of the box, 312 inches from the shortest point at the back and 1 12 inches from the bottom edge, using a drill driver equipped with a 3/8-inch drill bit.
At 1312 inches from the bottom of each leg, drill a hole with a diameter of 3/8 inches. The ends of the leg crosspiece should be flush with the back border of the legs when it is screwed between them. Fill all the seams and fastener holes with wood putty using a knife. All parts were sanded, primed, and painted.
Step 7 Bolt the legs to the box
Utilizing a washer on the outside of the leg, four washers between the leg and the box, a washer within the box, and a locking nut on the end of the bolt, insert a 3/8-inch bolt between the leg and the box. Using a screwdriver and an adjustable wrench, tighten the bolt.
Step 8: Screw on the Lid
Twelve inches from one end of the lid, fasten a block to the bottom. The collapsed ramp can be removed underneath the bed using this block as a handle. On top of the lid, place the box upside down. The box should be centered between the sides of the lid, and its ends should be flush with those of the lid. Install a 30-inch piano hinge, knuckle side out, to the side of the box using a drill/driver. To the bottom of the lid, screw the hinge.
Step 9. Install Hardware
On the same side as the piano hinge, attach the toy box hinge to the inside before mounting it to the underside of the lid. On the side opposite the piano hinge, attach the folding door hinge to the box’s outside 12 inches from the top edge. The other end of the folding hinge should be fastened to the leg’s front edge. The hinge’s ends should be installed at a 9-inch distance from the bolt hole, equal between them.
For simple lifting while extending the legs, screw a drawer pull to the back end of the box. Install non-slip rubber pads or strips on the bottom of each leg, attach skid feet to the crosspieces on the underside of the box, and attach the crosspieces between the legs to the back of the crosspieces.
Step 10. Mount a non-slip rug on the lid
Cut a non-slip rug, like the sisal in this photo, to the lid’s size. In a well-ventilated room, roll contact cement onto the lid’s top and the sisal mat’s underside. Give the contact cement time to feel dry. To prevent the surfaces from coming into touch and bonding right away before the rug is precisely positioned, place scrap pieces of wood on top of the lid.
Make sure the rug’s end is flush with the lid’s end. Remove the scraps gradually to allow the rug to adhere to the lid, being careful to keep the rug’s edges flat with the lid’s edges. Once the rug is fastened, move from one end of the lid to the other.
Purchase some Wood Ramp
Wood Ramp with Heavy Duty Carpet
This attractive cherry wood ramp is 25 feet long “with assistance for dogs weighing up to 120 pounds in height. Your pets can easily navigate the sloping slope thanks to a heavy-duty carpet that produces a non-slip surface.
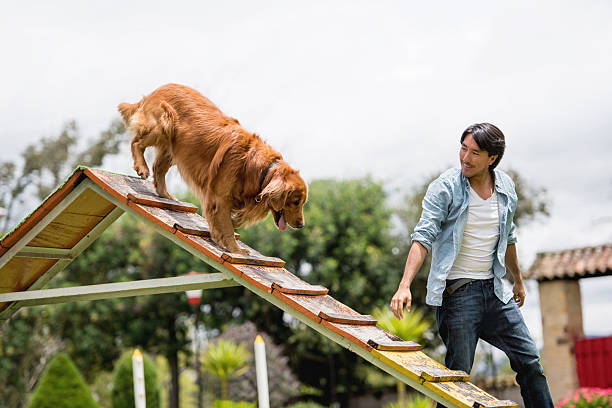
Designer Tip: You may make your dog ramp out of some scrap wood and a sturdy, non-skid carpet or liner. Several videos online can show you how to build a dog ramp for a bed. But to construct a ramp that adjusts, you might require specialized expertise. A slanted, stationary, single-position ramp would be a better option for beginners.
High-Density Foam Stair Ramp with Four Steps
Some dogs would rather use a stair ramp to enter and exit the bed than an inclined arching option. This four-step ramp’s durable, high-density foam provides the ideal combination of soft and firm support for senior dogs.
Adjustable Light Wood Ramp in a Minimalist Style
With four height adjustment options up to 24 inches, this light pine wood ramp provides stability and has a black polyester-lined anti-skid surface “tall. The ramp sits at 2.75 when closed “39.25” length, 15.75″ wide, and tall.
Solid, machine-washable cushion ramp
This triangular wedge ramp of high-density foam is available in 10 machine-washable fabrics. The lightweight form and versatile neutral hues make it an excellent tool for moving from room to room.
Design Suggestions:
You don’t have to limit yourself to making a wood dog ramp for a bed. Alternatively, you may cut your ramp out of high-density foam. If you use this technique to create a dog ramp for a bed, you’ll be able to create a ramp with a triangle shape that is made of one solid piece and work more effectively. But for those who have experience, cutting foam could be challenging. However, the low cost of a single-piece foam ramp makes it worthwhile to avoid DIYing.
Connect Easily Sloping Ramp
These dog ramps for beds have removable, machine-washable carpet treads and are put together by snapping the pieces together. The gradual slope rises to 28 “tall and can support 150-pound dogs. And there are two hues available.
Rails and an Adjustable Wood Ramp
With six height-adjustable rails and detachable sides, this wooden dog ramp supports older or damaged puppies who are unsteady on their feet. An anti-skid pad prevents dogs from slipping, and spherical stickers protect the bottom.
Designer Tip: Wood dog ramps with rails provide several advantages, including preventing your dog from tumbling off the ramp as they walk up or down. They work well with tall beds as well. Building a pet ramp yourself may be less expensive than purchasing a ready-made model if you have faith in your ability. If you construct the ramp properly, giving your dog a safety ramp could be safe.
Purchase Guide
Selecting the ideal dog ramp for a bed is relatively easy. This is especially true if you can access all the information needed to select the ideal dog ramp. If you still need clarification on what you should be looking for, stay reading; we’ll list them all for you.

Which dog ramp style should I pick?
The designs frequently have definite goals in mind. Several are designed expressly for use with furniture items, including mattresses, couches, and sofas. However, you can also discover models that are appropriate for automobiles. Additionally, dog ramps may appear as fancy stairs with railings and padded rungs. Knowing what you want is the key to selecting a dog ramp. Choose a dog ramp that can be used on any surface rather than just beds. The ramp must also function in your car, on couches, and everywhere else.
What aspect of dog ramps should you pay the most attention to?
The best model to get when buying dog ramps for beds is one with texture, so there are tiny grooves that your pet’s paws can hold onto. One of the most crucial factors you must consider is traction, which you must keep in mind.
If you’ve ever attempted climbing and descending a ramp, you know how it might seem like both of your feet are slipping out from under you. This is because the surface you put your feet on is not parallel to the floor or ground; rather, it is at an angle, compromising our stability as gravity pulls us.
Your risk of falling will increase if your feet have little traction. Dogs share the same traits. Your dog’s paws should feel safe on the hard surface as it ascends and descends an elevation.
What basic styles of canine-inclined platforms are there?
Folding, telescoping, and immovable platforms are the primary varieties, each with specific benefits and drawbacks.
Inclined platforms of the telescopic and folding variety offer versatility because they are simple to move and store. We prefer the telescopic because it is simpler to extend—slide one panel over another. The possibility of you striking yourself with flipping or folding panels is decreased with telescopic dog ramps for beds. In addition, a lot of work needs to be done on folding mechanisms. Of course, there is a drawback, which is the higher price tag associated with telescoping systems.
You can choose fixed dog ramps for beds if you won’t need to transport your dog ramp because you’ll just be using it in one location.
Make sure to purchase a dog ramp for the bed as soon as possible to provide your pet with the necessary safety. Now that you know the elements you must consider when purchasing a ramp for your dog, look at your options right now!